Setting up your Google Analytics 4 Tracking
- Create a Google account for your organization’s analytics, or login to your existing account at https://analytics.google.com/
- If you don’t have any analytics setup on the account yet, you’ll see a welcome screen with a [Start Measuring] button

- Click that button, then fill in the form that is present, and click [Next]. (For the account name, you can use your organization name, or something else memorable to distinguish this account from others you may manage)
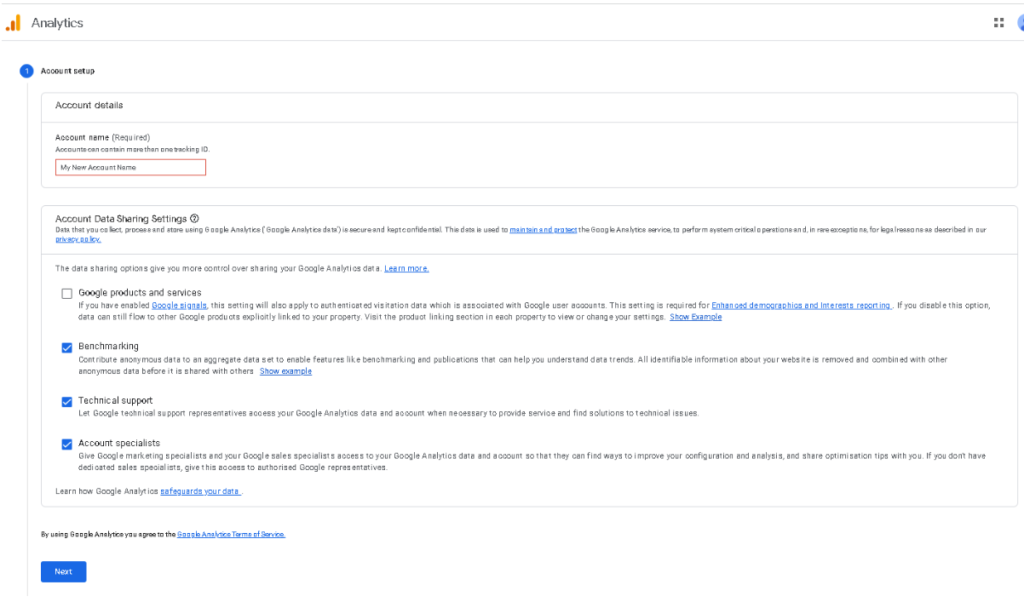
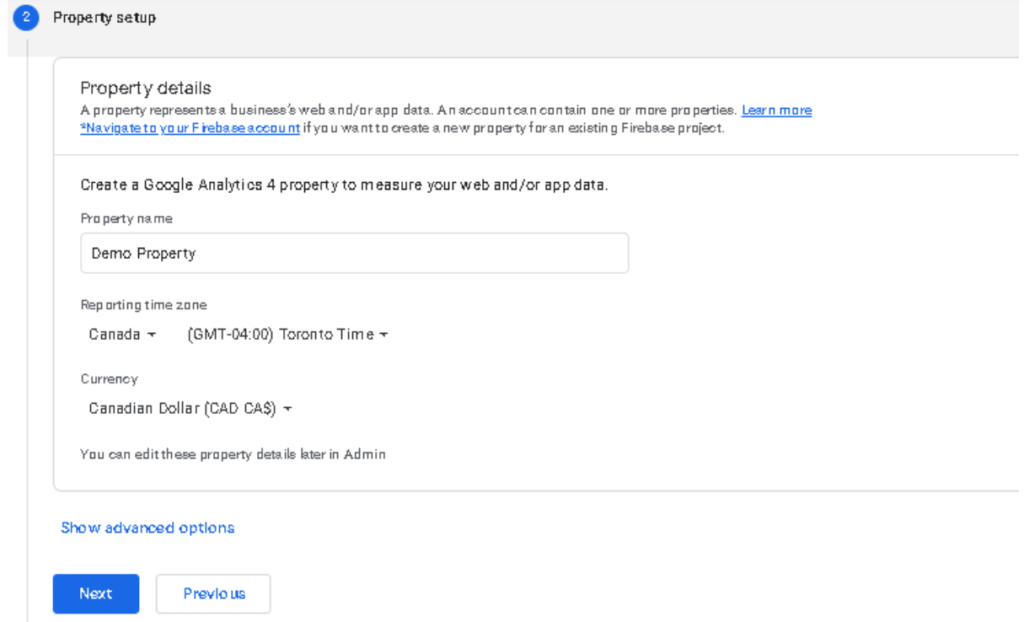
- Fill in the Property Setup form. The property Name helps distinguish the different things you might be tracking, for example a public myImpactpage.com page, vs your organization home page, vs an app that you might have developed and so on. Make sure to enter the correct country and time zone and click [Next]
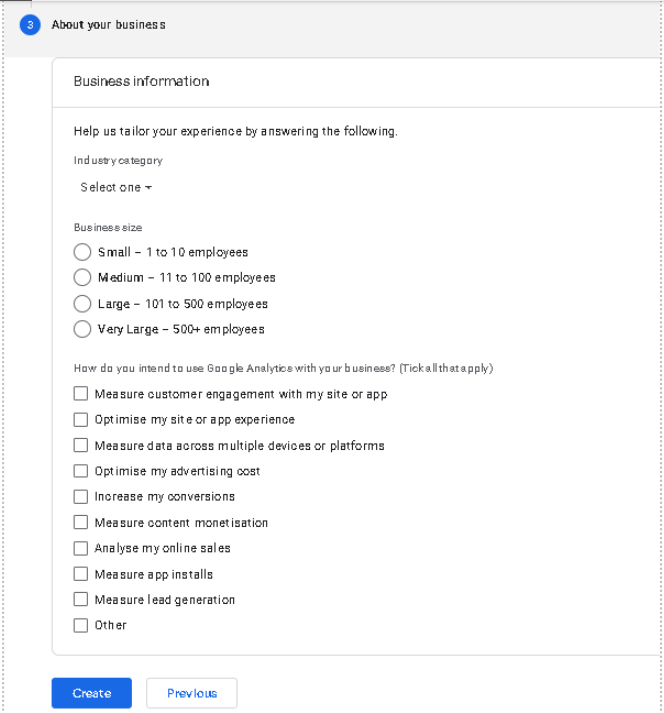
- Enter your business information and then click [Create]. This information helps Google provide some generic reports that may be relevant to your organization. None of this information is required
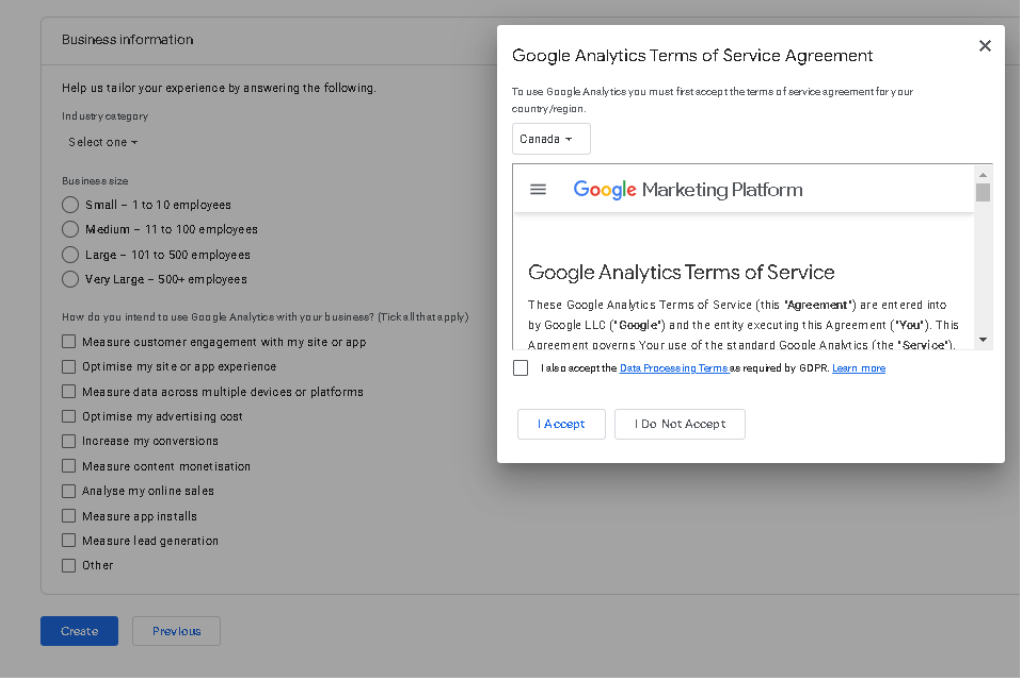
- A dialog may come up asking you to agree to the Terms of Service. Make sure the correct country is selected, read the terms, and accept the policy if you want to carry on with setting up the analytics account
- Congratulations, you now have a GA4 property set up. Continue the steps below to setup your data stream and begin tracking
Using you Current Google Account Setup for Analytics
- Click the Admin Settings Icon at the bottom left of your analytics.google.com home page
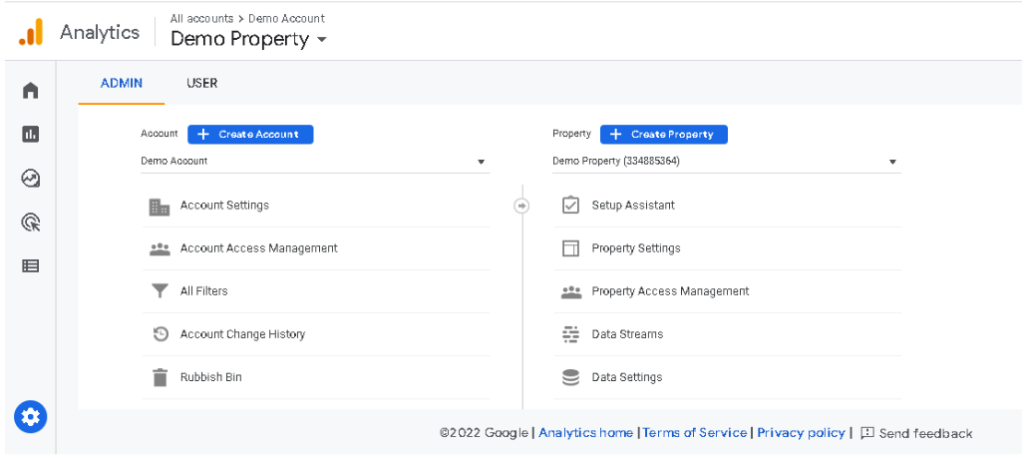
- In the Account section, you may select your existing account, or click the [+ Create Account] button
- If you click the [+ Create Account] button, you will be brought to the same page as Step #2 of the Setting up your GA4 Tracking instructions above, to create the account. Follow those steps till the end, and then pick up here again
- Once you have selected an account, or created a new, you can choose an existing property, or click the [+ Create Property] button
- If you choose to create a new property, you’ll be brought to the same screen as step #3 of the Setting up your GA4 Tracking instructions above, to create the property. Follow those steps and pick up here when done
- Make sure the property you’ve created is selected, and then click the “Data Streams” option in the menu below the property name
- Then click the [Web] button
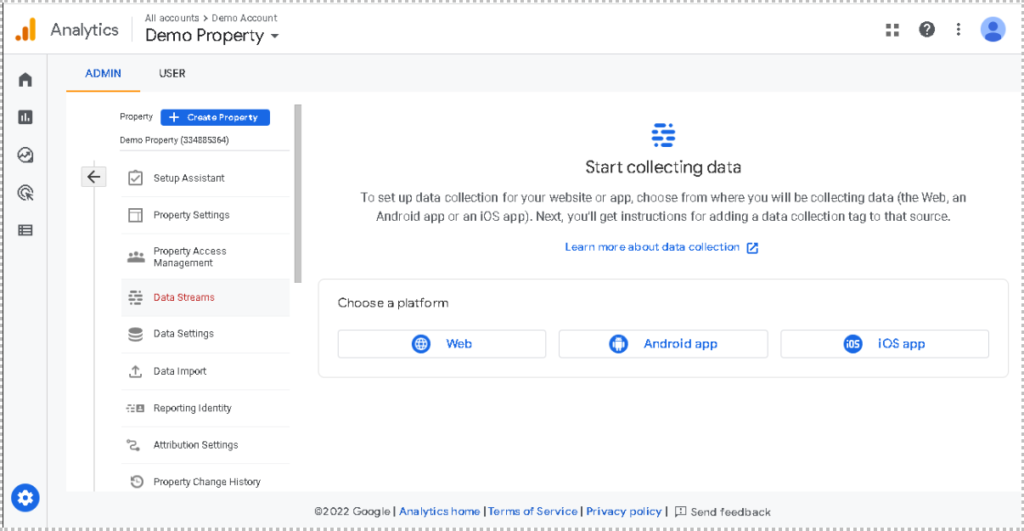
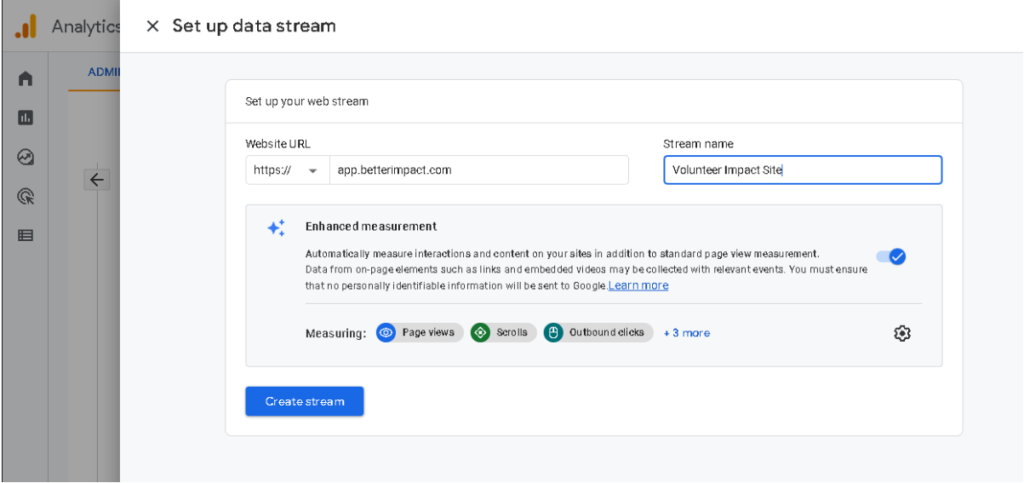
- Enter app.betterimpact.com in the site, and give your stream a sensible name like “Volunteer Impact Site” or “Volunteer Public Page”. You can choose which enhanced measurements you would like to track or not track, and then click the [Create stream] button
- This will then bring up your Web Stream details, including the stream name, url, id, and most importantly the MEASUREMENT ID
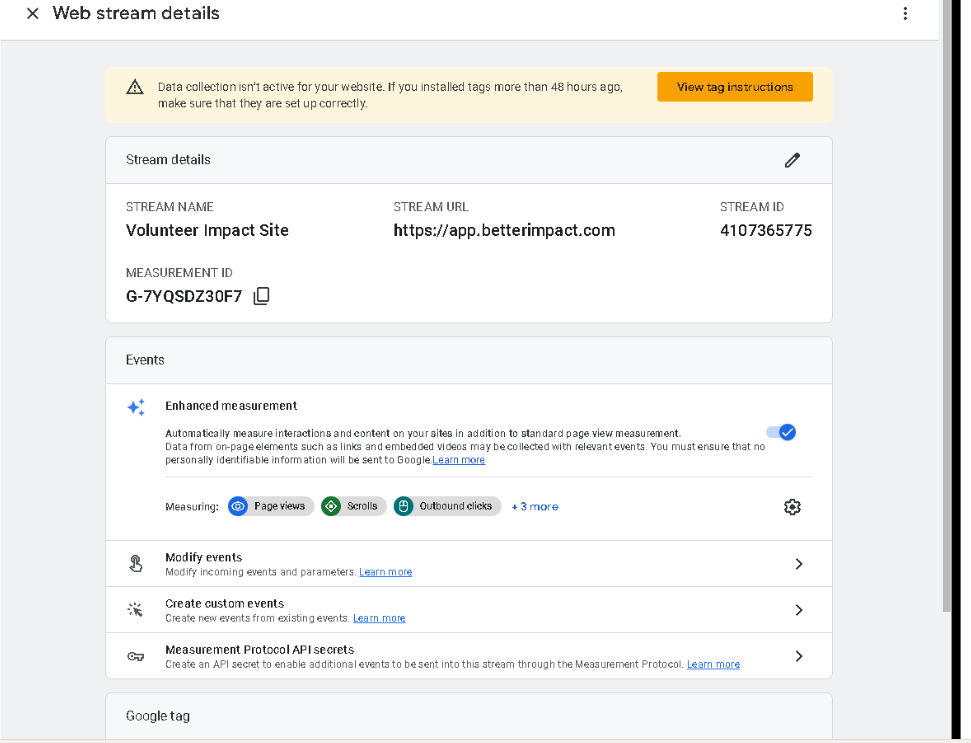
- Copy that Measurement ID (you can use the copy icon beside it, or highlight the ID, right click, and select copy) and proceed with enabling Google Analytics in your Better Impact account
Enable Google Analytics
- Once you have set up Google Analytics, go to Configuration, then click on “Public Volunteer Page Settings” found in the sidebar under Recruitment
- Scroll down to the “Configuration” section
- Enter your tracking ID, generated during your Google Analytics setup
- Click the [Save General Settings] button
- You’re all set! To see your traffic analytics, click the Reports icon/option on the left-hand side of your Google Analytics home page. From here you can see real-time data, as well as track your engagements and page views and much more!
Using an Existing GA4 Property and Web Stream Setup
If you are already tracking your website traffic using an existing GA4 tag, you can update the domain names that the stream is associated with, to include app.betterimpact.com and set your tracking-id in your admin portal to that same GA4 tag.
- From your Google Analytics home page, click the Admin Icon
- Select your account, property and stream
- From the Web Stream Details scroll down to “Configure tag settings” and click it.
- In the Settings box, click “Configure your domains”
- Click “Add Condition”
- Select “Begins with”, and enter app.betterimpact.com
- Click “Save” and you are all set!

